Friday, April 27, 2012

Serving Up {Salad}: Green Feta Salad


I love green salad!  It seems like there are endless possibilities and combinations out there.  I hosted a dinner at our home recently and the family joining us had some specific dietary restrictions.  As such, I was searching for some recipes on the internet that met their restrictions.  I wasn't specifically looking for a salad recipe, but in my search for other recipes, I stumbled upon this recipe and thought that I would welcome a new green salad recipe.  I am so glad that I did.

This recipe is very simple.  You could add additional add in's, but we kept it simple and it was a hit.


One Year Ago: Orange Tortilla Soup
                         Chicken Tikka Masala

GREEN FETA SALAD     
(recipe from allrecipes.com)
printable version

4 Tbs. olive oil
2 Tbs. white wine vinegar
1 Tbs. dijon mustard
1/2 tsp. salt
1/2 tsp. pepper
1 pinch sugar
1 tsp. fresh parley, chopped
1 tsp. fresh lemon juice
2 cloves garlic, minced
1 avocado, peeled pitted and cubed
4 cups mixed salad greens
1/2 cup sliced almonds
2 ounces feta cheese, crumbled

In a medium bowl, whisk together the olive oil, vinegar, mustard, salt, pepper, sugar, parsley, lemon juice and garlic.  Add the avocado, and stir to coat with the dressing.
Just before serving, place salad greens in a large bowl.  Add the avocado's and dressing and toss to coat.  Sprinkle with sliced almonds and feta cheese over the top.

Wednesday, April 25, 2012

Serving Up {Cookies}: Chocolate Rolo Cookies


This is my second recipe this week for using up those leftover rolo candies from Easter - although, truthfully, rolo's don't last that long at our home and I probably ought to have posted these recipes two weeks ago.  Sorry about that.  It turns out that I am not the only one with rolo's on the mind....just this week I have had a couple of rolo recipes land in my google reader.  I haven't made either recipe (yet), but both look a little sinful  - check them out here and here.

In my "prior" life (prior kiddos, prior marriage) I worked as a Registered Nurse. I worked for almost seven years before I took my maternity leave 11 years ago :) During part of my nursing years, I worked in the operating room of a large hospital that was involved in many humanitarian projects. Twice during my time working there, the operating room staff published cookbooks in an effort to raise funds for different medical missions. Since I was young and just beginning my domestic skills, those cookbooks became my standards as I cooked my way through both cookbooks. I have since put those cookbooks aside and don't pull them out near as much as I used to, except for specific recipes. Chocolate Rolo Cookies is one of those recipes.

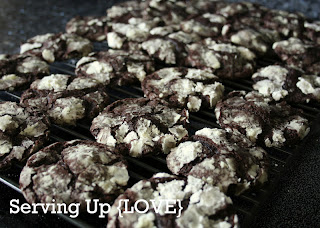
This recipe is a basic Chocolate Crinkle recipe (even though I don't ever do chocolate crinkles in a basic form - see my recipe for Loaded Chocolate Crinkles here).  The gist of this recipe is chocolate cookie dough wrapped around a rolo and then rolled in powdered sugar and baked.  The rolo melts in the process of baking, leaving a delicious caramel layer inside of your cookie.  Oh, so good!


One Year Ago: Chunky Monkey Pancakes
                        Orange Frostie

CHOCOLATE ROLO COOKIES     
(recipe from Penny W.)
printable version

1 cup sugar
1 cup brown sugar
1 cup butter, softened
2 eggs
1 tsp. vanilla
3/4 cup unsweetened cocoa
1/2 tsp. salt
1 tsp. baking soda
2 1/2 cup flour
approx. 50 rolo candies
powdered sugar

Preheat oven to 350 degrees.
Combine sugars and softened butter in a mixing bowl; cream together until smooth.  Add eggs and vanilla and blend until well combined.  Add dry ingredients and mix thoroughly.  Wrap about 1 Tbs. dough around one rolo candy and then roll the ball in powdered sugar.
Place on ungreased cookie sheet.  Bake at 350 degrees for 10-12 minutes.

Monday, April 23, 2012

Serving Up {Cookies}: Rolo Cake Mix Bars


If your local store is still selling off their Easter candy at 50% off, I highly encourage you to get over there and stock up on rolos!   I have a couple of recipes that are beyond delicious and both use rolos as an ingredient. I just love the combination of caramel and chocolate.  I thought I would share both recipes this week just in case your Easter candy was still lurking.

Today's recipe is one that I searched for in an attempt to replicate a cookie/bar that I had eaten at a church function.  When I had it for the first time, I was convinced that it used a cake mix and promptly went home and searched for something similar to it in my Cake Doctor book, disappointed when I came up empty handed.  Thank goodness for the internet!  Using technology I was able to stumble upon this, and although I don't know whether it is the exact recipe of what I originally enjoyed, it is definitely similar and definitely a hit at our house.


One Year Ago: Grandma's Banana Bread
                          Sandy's Spinach Salad

ROLO CAKE MIX BARS     
(recipe from Cookies & Cups)
printable version

1 pkg. yellow cake mix
5-ounce evaporated milk
1/4 cup butter, melted
40 (approx) rolo candies, unwrapped and cut in half

Preheat oven to 350 degrees. Prepare a 13x9 pan with non-stick spray.

In a large bowl, beat the cake mix, milk and butter with blenders until blended (batter will be thick). Divide batter in half and press half of mixture the baking pan and bake for 10-12 minutes, until set.

Remove from oven and place rolo candies, caramel side down, over crust. Drop remaining batter by tablespoonfuls over the top. Bake 22-26 minutes longer or the top begins to turn golden brown.

Cool on a wire rack prior to cutting into bars.

Thursday, April 19, 2012

Serving Up {Salad}: Chinese Cabbage Salad with Peanut Sauce


I have a tried and true Oriental Chicken Salad that I have been making for years and I am pretty sure that most of you have eaten a variation (or two) of it.  You know the recipe, the one with ramen noodles and cabbage....such a yummy salad!

When I saw this particular version of the salad, with napa cabbage, toasted ramen noodles and a peanut sauce, I knew I just had to try it.  The flavor of this salad is completely different from my tried and true, so I think there needs to be space in my recipe box for both!

This recipe does not call for chicken, but if you wanted to serve it as an entree dish you could absolutely add a couple of cups of diced chicken.  If doing so, my recommendation would be to increase the dressing by 1/2 and use that additional dressing to toss the chicken with prior to adding it to the salad.  That would enhance the yummy peanut flavor, versus adding plain chicken which would decrease the flavor of the dressing.

Unlike the original recipe, which I think tastes better after the first day (the ramen noodles get nice and soft), I prefer this salad served right away while the noodles are nice and crisp (you just sauteed them in butter to toast them for heaven's sake).  I am curious if you agree...


One Year Ago: Chilled Raspberry Soup
                          Strawberry Cream Cake

CHINESE CABBAGE SALAD with PEANUT SAUCE     
(recipe from Jamie Cooks It Up)
printable version

2 pounds nappa cabbage
5 green onions
3 packages ramen noodles
1/2 cup butter
1/4 cup sliced almonds
1/4 cup sesame seeds

Dressing:
3/4 cup peanut oil *
1/2 cup sugar
1/4 cup rice vinegar
2 Tbs. soy sauce

Cut the end off of your cabbage, discarding it.  Thinly slice the rest of the cabbage and place it into a large bowl.  Slice your green onions and toss them into your bowl.
Carefully crush your ramen noodles while still in their package (you could open them and place in a ziplock bag if preferred).  Place butter in a large skillet over medium heat to melt.  Add almonds, sesame seed and crushed ramen noodles.  Cook, stirring frequently, until everything is toasted well.  Set aside.
Combine peanut oil, sugar, rice vinegar and soy sauce for the dressing.  Mix well until well combined and sugar is dissolved.
When ready to serve, combine cabbage, raman noodles and dressing and toss until well coated.

*If you cannot find peanut oil, there is a tip for substitution here*

Tuesday, April 17, 2012

Serving Up {Entree}: Sausage Stuffed Potatoes


My son announced recently that after eating potatoes at a friend's home for dinner he now loves potatoes.  Since I know how short lived such proclamations can be, I have jumped on the potato bandwagon and have been serving a number of potato entrees.  

I'm pretty sure whether a declared potato lover or not, these sausage stuffed potatoes would be a hit.  I use Sage flavored sausage, which only adds to the flavor of the end product.  The mayonnaise sauce, with it's dijon kick and lemon undercurrent, makes the entire dish.   I hope you agree.


One Year Ago: Spinach Artichoke Stuffed Shells

SAUSAGE STUFFED POTATOES     
(recipe from Smitten Kitchen)
printable version

4 large russet potatoes, scrubbed
6 Tbs. mayonnaise
2 Tbs. plus 1 tsp. water, divided
2 Tbs. tomato paste
1 tsp. anchovy paste
4 Tbs. Dijon mustard, divided
1 medium onion, finely chopped
2 Tbs. olive oil plus additional for coating potatoes
1 slice firm white sandwich bread
2 Tbs. milk
1 pound bulk breakfast sausage
2 Tbs. chopped parsley
1 tsp. fresh lemon juice
8 cups salad greens

Prick potatoes with a fork.  Bake until tender (I like to bake my potatoes in the crock pot).  Cut each potato in half lengthwise and scoop out center (save for another use), leaving 1/2-inch-thick walls.  Coat skins of potatoes lightly with oil.  Place in shallow baking pan.  Preheat oven to 350 degrees.

Whisk together mayonnaise, 2 tablespoon water, tomato paste, anchovy paste, and 3 Tbs. mustard.  This is your mayonnaise sauce.

Cook onion in oil with a pinch of salt in a small heavy skillet over medium heat, stirring occasionally, until golden, about 10 minutes.

Meanwhile, tear bread into small pieces, then soak in milk in a medium bowl until very soft. Mix in sausage, parsley, onion, and 4 Tbs. of mayonnaise sauce.

Divide filling between potatoes and cook in preheated oven until the sausage is cooked through, about 30 minutes.

While potatoes bake, whisk 1 tablespoon mayonnaise sauce with lemon juice, remaining 1 Tbs. mustard and 1 teaspoon water, and salt and pepper to taste.  This is your dressing for your greens.

Remove potatoes from oven and turn on broiler. Spoon remaining mayonnaise sauce over filling and broil 3 to 4 inches from heat until bubbly, 3 to 5 minutes. Cool slightly.

Toss greens with dressing and serve with potatoes.

Thursday, April 12, 2012

Serving Up {Brownies}: Twix Brownies


This is the second recipe from my Easter weekend that became an instant hit!   I only wish I had a better photo to show it off, but at the rate these brownies were eaten, by the time I realized the photo was horrible, there were no brownies left to take a picture of.  That is how good these brownies are.

And it is a brownie, but it doesn't even realize that it is a brownie.  A boxed brownie mix baked atop a shortbread crust, topped with caramel and then a chocolate topping - it's actually called a Twix brownie.  I call it delightful.  I think you will too!


TWIX BROWNIE     
(recipe from Jasey's Crazy Daisy via pinterest)

Crust Layer
1 (12.8 oz.) package of Simply Sandies Shortbread Cookies
6 Tbs. butter

Brownie Layer
1 box of brownie mix plus ingredients to prepare
1/4 cup hot fudge ice cream topping

Caramel Layer
1 (14 oz.) bag of caramels
2 Tbs. heavy cream

Chocolate Topping
1 (11.5 oz.) bag milk chocolate chips
2 Tbs. butter
1/4 cup heavy cream

Line a 9x13 pan with foil and then grease the bottom and sides.

Using a food processor, pulse the cookies until they are completely crumbled.  In a medium bowl, melt butter. Add cookie crumbs and stir until all the crumbs are moist. Press into the bottom of prepared pan.

Prepare brownie batter as directed on the back of the box, mixing 1/4 cup hot fudge ice cream topping into brownie batter. Pour batter on top of cookie crust and bake as directed.  Cool.

Place caramels and cream in a saucepan and cook over medium-low heat, stirring constantly, until caramels are completely melted. Pour caramel over cooled brownies.  Allow brownies to cool until set.  You can quicken this step by placing brownies in the refrigerator until caramel layer is set up.

Melt chocolate, butter, and cream together in a saucepan over medium-low heat, stirring occasionally, until melted and creamy. Pour over cooled caramel layer.  Cool to allow chocolate to set.

Cut and enjoy.

Tuesday, April 10, 2012

Serving Up {Dessert}: Creme Brulee Cheesecake Bars


I am playing a bit of catch up here in blogland.  If only it were just my blogs that I was falling behind in!  Ughh!

I wanted to begin today by posting the first of two new recipes that I made for our family Easter dinner.  Although these are not old family recipes that have stood the test of time, they are absolutely new favorites that I cannot wait to make again!  If you doubt my intentions, let me admit that I have already gone to the store to purchase the ingredients so that I will have them on hand when the cheesecake need craving hits.  

Today's recipe is for Creme Brulee Cheesecake Bars from Taste and Tell.  I have had this recipe "bookmarked" for a long time and I think that I had (wrongly) assumed that they would take longer to prepare than they really did.  Even though they are a baked cheesecake bar, they whip together so quickly that there is really no excuse to delay in making them.  Believe me, after having eaten one, two, a few, I am telling you that these bars are incredible!

One Year Ago: Gooey Butter Cake

CREME BRULEE CHEESECAKE BARS     
(recipe from Taste and Tell)

1 pouch (1 lb 1.5 oz) Betty Crocker sugar cookie mix
1 box (4-serving size) French vanilla instant pudding
2 Tbs. brown sugar
1/2 cup butter, melted
2 1/2 tsp. vanilla (divided)
2 eggs plus 3 egg yolks
2 packages (8 oz each) cream cheese, softened
1/2 cup sour cream
1/2 cup sugar
2/3 cup toffee bits, finely chopped

Heat oven to 350 degrees. Lightly spray the bottom and sides of 13x9 inch pan with cooking spray.

In a large bowl, stir cookie mix, pudding mix, brown sugar, melted butter, 1 teaspoon of the vanilla and 1 whole egg until a soft dough forms. Press the dough into the bottom and 1/2 inch up the sides of pan.

In a small bowl, beat the cream cheese, sour cream and sugar with an electric mixer on medium speed until smooth. Add remaining whole egg, 3 egg yolks and remaining 1 1/2 teaspoons vanilla; beat until smooth. Pour over the crust in the pan.

Bake for 30 to 35 minutes or until the center is set. Remove from oven and immediately sprinkle with the crushed toffee bits. Allow to cool at least 30 minutes. Refrigerate about 3 hours or until well chilled prior to serving.

Friday, April 6, 2012

Serving Up {Dessert}: Hot Fudge Sauce


The power of suggestion!  The mere mention of brownies topped with ice-cream and hot fudge sauce in my last post (here) destroyed all my willpower and I was left with no choice but to whip together some homemade hot fudge sauce.  Luckily for me, my recipe is super quick, super easy and super delicious.

Quick story - last summer our family was invited to a neighborhood ice-cream/swim party.  I had been eyeing a hot fudge recipe online that was completely different from mine and I thought that taking hot fudge to the ice cream party would be pretty terrific of me and a great reason to try this new recipe.  Granted, it turned out very tasty, but it's first strike against it was that it had twice as many ingredients as my recipe, including corn syrup (yuck!).  Then to my horror, as the sauce cooled down (including when it hit the ice cream), it got ROCK HARD!  I really wanted to go swipe it off the topping table and hide it.  I kid you not, I saw a child walking away from the table with a large piece of it telling his mom that there was "fudge" at the treat table!  Thank goodness it was in a container that did NOT have my name on it :)

I mention all of that only to assure you that this hot fudge sauce remains a "sauce" even after putting it atop ice cream or after refrigeration.  Love that!  You can still heat it up for the "hot" part of the Hot Fudge Sauce, but should you choose to serve it directly from refrigeration, there is no chisel required.  Let's admit it, it is a whole lot easier to steal a little spoonful when you are craving a little chocolate when you can just dip your spoon right in.  But who does that? (wink!)


One Year Ago: Strawberry Spinach Salad

HOT FUDGE SAUCE     
(recipe from Christyn A.)
printable version

1 14-ounce can sweetened condensed milk
2 1-ounce squares unsweetened baking chocolate
2 tsp. vanilla
2 Tbs. butter

Combine sweetened condensed milk and chocolate in a heavy saucepan over low heat.  Heat until the chocolate is melted, stirring occasionally.
Remove from heat and add vanilla and butter, stirring until the butter is completely melted.
Serve over ice cream
Store any leftovers in the refrigerator.

Wednesday, April 4, 2012

Serving Up {Brownies}: Heavenly Brownies


My blog is officially one year old!  I have to admit that when I began I wasn't sure if it would even make it this long :)

In reviewing the recipes that I have posted (and the many more that I still want to post) I was shocked to realize that I had not yet posted my all time favorite brownie recipe.  In an entire years time you would think that I would set my priorities!  (I have posted this favorite brownie recipe, but real life dictates that, sadly, not all brownies can be mint brownies).

I am definitely a brownie girl.  And it isn't about the chocolate because I don't get weak in the knees over chocolate cake the way I do over brownies.  It is something about the dense texture, the chewy chocolate goodness and the fact that no frosting is needed before digging in - although a scoop of ice cream and drenching it all in fudge syrup doesn't hurt anything.  And boy do these brownies have the dense texture and the chewy chocolate goodness down!  When I lived in Vegas there was a little market that sold baked goods and their brownies were SO good!  They are the only store baked good that I have ever indulged in on a regular basis.  These rival those brownies!

When I make this recipe I use one bowl and a wooden spoon - which is all the more reason to love this recipe for it's simplicity.  I take the microwave method over the stove top method for heating the butter and sugar and find that once I mix my sugar in with the melted butter I microwave the mixture three times for one minute each time, stirring in between.  I don't know what that does, but it DOES make a difference.  I also find that if you can keep from eating the entire pan immediately, freezing these brownies only  make them all the better.  An individual brownie, snuck from the freezer while kids are sleeping and eaten while only partially thawed is divine!
(Oh, and my only tweak to this recipe from the way I found it was to remove the espresso powder - so if that is your thing, add it back in.)


One Year Ago: Slow Cooker Italian Beef Sandwich

HEAVENLY BROWNIES     
(recipe from King Arthur Flour)
printable version

1 cup butter
2 1/4 cup sugar
1 1/4  cup dutch-process cocoa
1/2 tsp. salt (increase to 1 tsp if you use unsalted butter)
1 tsp. baking powder
1 Tbs. vanilla
4 large eggs
1 1/2 cups flour
2 cups chocolate chips

Preheat the oven to 350 degrees. Lightly grease 9x13 pan.

In a medium bowl, or in a saucepan set over low heat, melt the butter, then add the sugar and stir to combine. Return the mixture to the heat (or microwave) briefly, just till it’s hot, but not bubbling; it’ll become shiny looking as you stir it. Heating the butter and sugar a second time will dissolve more of the sugar, which will yield a shiny top crust on you brownies. Transfer the mixture to a mixing bowl.

Stir in the cocoa, salt, baking powder and vanilla. Add the eggs, beating till smooth; then add the flour and chocolate chips, beating till well combined. Spoon the batter into the prepared pan.

Bake the brownies for 28-30 minutes, until a cake tester inserted into the center comes out dry. The brownies should feel set both on the edges, and in the center. Remove them from the oven, and after 5 minutes loosen the edges with a table knife; this helps the brownies from sinking is the center as they cool. Cool completely before cutting and serving.
<script type="text/javascript" src="//assets.pinterest.com/js/pinit.js"></script>

Monday, April 2, 2012

Serving Up {Appetizer}: Creamy Avocado Dip


I think that avocado's are one of the most perfect foods out there.  So delicious and so versatile.  I love to eat them on salads, on sandwiches, in smoothies, with my eggs and even plain (well, plain with a squirt of lime and a dash of salt).  And then, of course, there is eating them with tortilla chips!  I have a hard time saying no to guacamole!

Turns out that I also can't say "no" to a creamy quacamole-esque dip either.  This recipe (guacamole meets cream cheese) is everything that you expect it to be...but mainly it is addictive!  At the store last week I did notice that Rotel is now selling a version of their diced tomatoes with lime and cilantro and I think that the next time I make this recipe I may try the new Rotel tomatoes in place of the original.   Either way, break out the chips and enjoy!


One Year Ago: Iced Sugar Cookies

CREAMY AVOCADO DIP     
printable version

8-ounce cream cheese, softened
1-2 avocado, diced
1/2 tsp. salt
10-ounce can diced tomatoes with green chilies (Rotel), drained

Place softened cream cheese and diced avocados in a medium bowl and blend until smooth.  Add salt.  Add diced tomatoes and mix by hand until well combined.
Serve with tortilla chips, pita chips or vegetables.