Tuesday, May 31, 2011

Serving Up {Dessert}: Granola Pudding Parfait


After posting my recipe for Cashew Granola, I feel like I have to share with you one of my favorite ways to eat it....which would consist of layering it with pudding and fresh (or frozen) berries.  It makes for such a yummy, easy summertime dessert.  I could eat it every day and never tire of it!

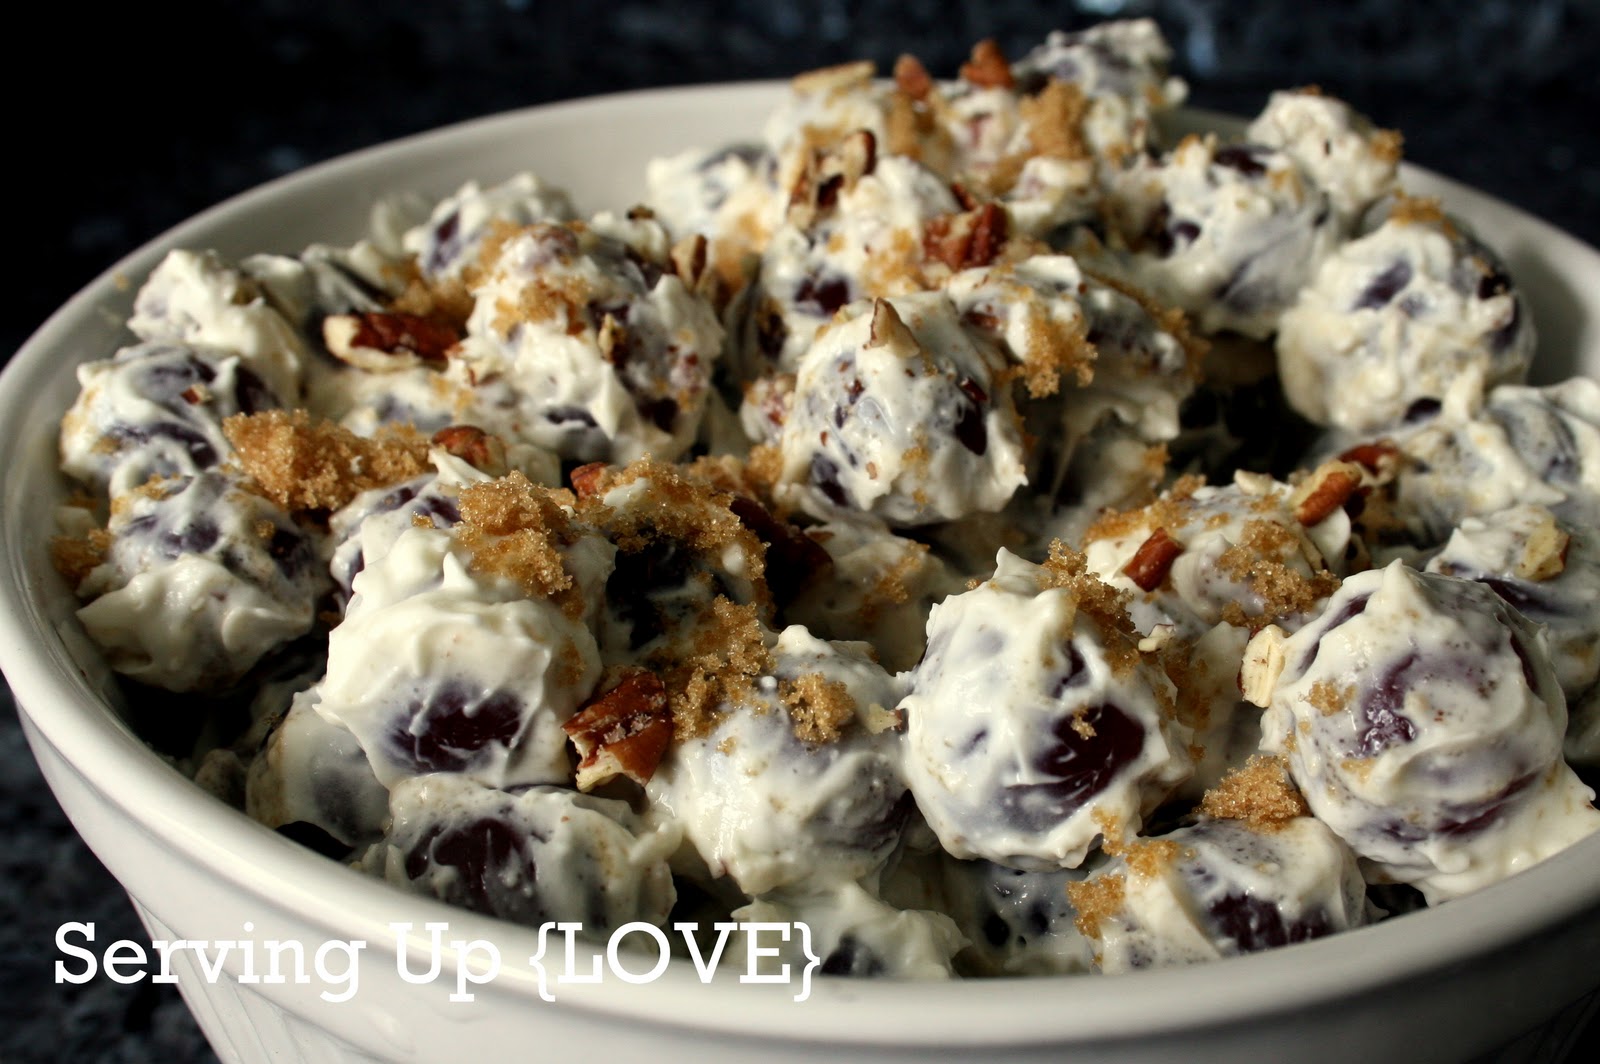
Here in the Pacific Northwest, berries are plentiful for most of the summer season.  We frequently go to the berry farms and pick our own.  It is just one of my favorite "perks" of where we live.  Would you hate me if I admitted that last summer I filled and froze 15 one-gallon bags with the plumpest, largest blueberries from my next door neighbors bushes = free.  I bagged and froze another 100 pounds of blackberries, picked and delivered to my door for only $1.25/pound.  Yum!

I do have to make one STRONG recommendation that, I think, makes a huge difference in the outcome of your parfait.  If you have a Trader Joe's nearby, purchase their instant Vanilla Pudding for this dessert.  It is unlike the vanilla pudding of your childhood - made with a good whole milk, your instant pudding will be mistaken for a homemade custard.  I promise!  You deserve this!

Of course, you could always use yogurt in place of the pudding for an even healthier dessert - but when I use yogurt it is called breakfast :)


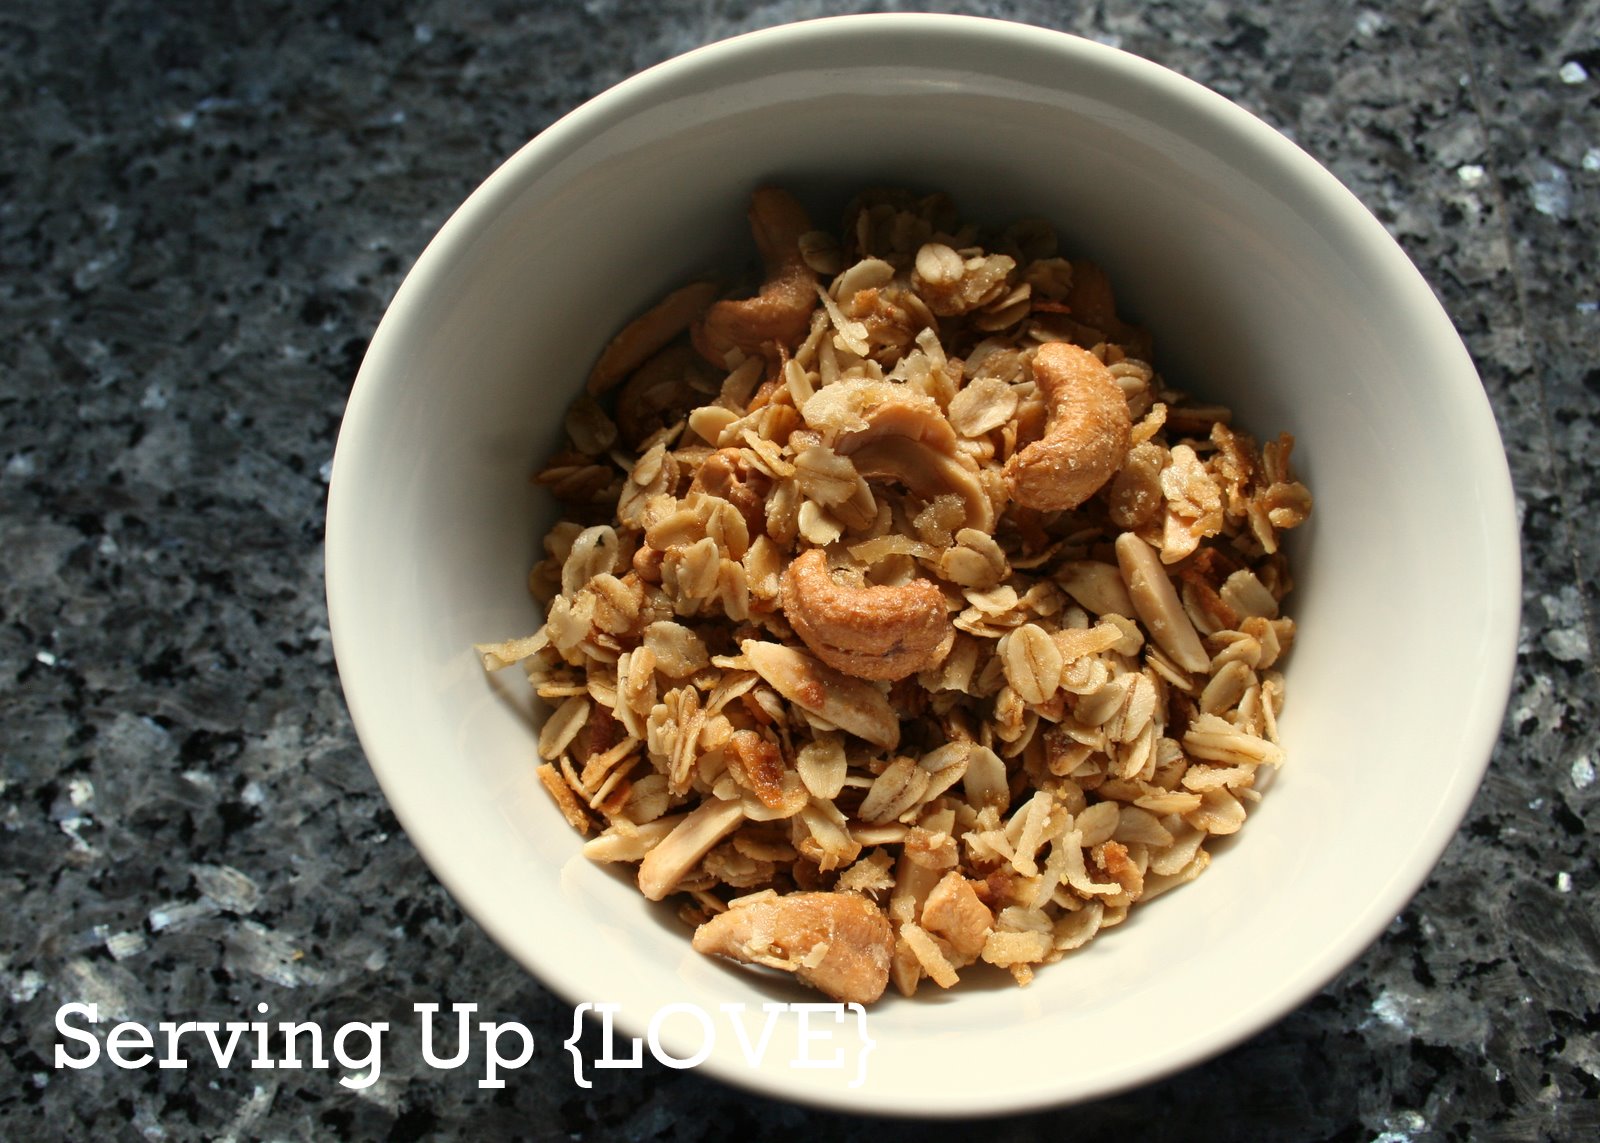
No recipe today folks - because really, it doesn't get any simpler than this!  Just get out your parfait glass and layer your pudding, some berries and some delicious granola (may I recommend this granola).  Then repeat your layers and prepare to swoon!

Monday, May 30, 2011

Serving Up {Breakfast}: Coconut and Cashew Granola

When I first began to weed out processed foods and make more "whole" food for our family, breakfast cereal was one of the first things to go.  Don't let me children's tear stained faces fool you - as a result of my anti-cereal stance they get hot breakfast meals most every single day.  So sad for them, I know!  But there are some days that we do need to be able to pour something into a bowl, drown it in milk and be out the door.  Quick!  Homemade granola is my answer.

I have two recipes that are tied for my favorite granola recipe.  This is one of the two.  Put it in a bowl covered in whole milk and you will find yourself getting out of bed in the morning just to eat it!  My husband and kids even like to eat it dry as a snack.  The only downside to this recipe is that we go through it REALLY fast.  As I have written the recipe below I have already doubled the recipe from what was on the original recipe, but generally I even double this amount.  What can I say?  We like us some granola!


COCONUT AND CASHEW GRANOLA     
(recipe from Mel's Kitchen Cafe)
printable version

6 cups old-fashioned rolled oats
¾ cup dark brown sugar
2 cups slivered or sliced almonds
2 cups cashews
1 ½ cups shredded coconut
½ cup coconut oil
¾ cup pure maple syrup
1 ½ tsp salt

Preheat the oven to 250 degrees. In a large bowl, combine the oats, sugar, nuts and coconut. In a separate bowl, combine the oil, maple syrup and salt and stir until well combined. Slowly pour the liquid over the oatmeal mixture and mix well. Divide in half and pour onto two 11x17 baking sheets, spreading out evenly.
Cook for 1 hour and 15 minutes, checking on it and stirring it every 30 minutes or so.  Bake until golden.

Optional: add 2 cups of raisins after granola is cooled.

Store in an airtight container or freeze.

Friday, May 27, 2011

Serving Up {Salad}: Sweet Grape Salad


This fruit salad just screams summer.  It's cool, refreshing, delightfully sweet and just plain delicious.  In truth, it makes a perfect summer dessert!  The only problem with serving it as dessert is that then you may feel a bit of guilt when you go back for seconds - whereas if it's served as the "fruit salad" then seconds are welcomed.  Right?  Please tell me I can go back for seconds.

I know that the first time you read the list of ingredients you will have some doubt enter your mind, but you have to trust me on this one.  I have taken this salad to multiple pot luck gatherings and at each one I have heard the low rumble of "who brought the grape salad? who brought the grape salad?"  It's one of those dishes that if you choose to take it to share, you may as well print the recipe to bring along because there will be requests.


SWEET GRAPE SALAD     
(recipe adapted from Cassie Craves)
printable version

3-4 pounds red seedless grapes (the original recipe only calls for 2 pounds but I use nearly double)
8 oz. cream cheese, softened
8 oz. sour cream
1/2 cup white sugar
1 tsp. vanilla
1/4 cup brown sugar, plus some additional to garnish
1/4 cup chopped pecans, plus some additional to garnish

Wash the grapes and remove from their stems.  Allow to air dry.
In a large bowl combine the cream cheese, sour cream, white sugar and vanilla.  Blend until smooth.  Gently fold in the grapes, 1/4 cup of pecans and 1/4 cup of brown sugar.
Sprinkle with brown sugar and chopped pecans to garnish.  Refrigerate until ready to serve.

Thursday, May 26, 2011

Serving Up {Entree}: Spinach Pie

I hate it when I'm at a loss when I write and, yet, as I begin to type this post I realized that I don't even know how to categorize this recipe.  Frustrating!  It may have "pie" in the title, but this is not something you would serve a'la mode.  It also has "spinach" in the title but the butter content alone negates it from being labeled a vegetable.  I do, however, think you could venture as far as to consider it a "brunch" entrĂ©e - think of it as a variation on quiche.

I first sampled this recipe on Christmas Eve.  My mother-in-law put together a 'Night in Bethlehem' and, with the help of my sister-in-law, created a lavish meal including roasted vegetables, nuts and dried fruit, salad and this Spinach Pie.  Blankets were spread on the floor as we ate a meal intended to represent the time period of the Savior.  The evening was delightful and touching, but among many fond memories are the memories of this delicious dish!  I've made this recipe three times already since.  Something about that feta cheese keeps me coming back!  Yum!

I will pass along one tip.  I usually avoid any recipe that calls for fillo dough because I think it is so difficult to work with.  My past experiences include it tearing and drying out and crumbling.  Ugh!  But I am guilty of freezing my packages of fillo dough.  My sister-in-law suggested refrigerating the dough and not freezing it.  It made all the difference for me.  I am no longer scared of fillo dough.  Bring it on!

SPINACH PIE     
(recipe from Sheri D.)
printable version

14 sheets Fillo Dough
10 oz. package frozen, chopped spinach
12 ounces cottage cheese *
8 ounces cream cheese *
4 ounces crumbled feta cheese
1/2 tsp. dried dill weed
2 scallions
1 medium onion
2 Tbs. vegetable oil
1/2 cup butter
1 large egg
1/2 tsp. black pepper

Chop the onion and thinly slice the scallions.  Saute in vegetable oil at medium heat until tender and golden.  Drain the spinach and squeeze dry.  Thoroughly mix the onions, spinach, cheese, dill, pepper and egg in a large bowl.  Melt and clarify the butter.  Brush the bottom and sides of a 13"x9" baking pan with butter.  Using 7 fillo sheets build a stack in the bottom of the baking pan by brushing half of each fillo sheet and folding in in half.  Spread the spinach and cheese mixture evenly over the fillo in the baking pan.  Cover the mixture using 7 fillo sheets in the same manner used to create the base.  Thoroughly butter the top layer, especially the edges.
Bake for 45-50 minutes or until golden brown in a 375 degree preheated oven.
Let it stand for 10 minutes before cutting for easier serving.  Cut into squares or triangles using a sharp knife.

* the recipe calls for low-fat cottage cheese and light cream cheese, so if you are into that I think you are safe to substitute.  I don't believe in "low-fats" and "lights" so I use the REAL stuff and the results are fabulous!  No guilt here!

Tuesday, May 24, 2011

Serving Up {Cake}: Mom's Chocolate Cake


Happy Birthday is being sung at our house today.  Following the singing we are going to devour this cake!

For the record, I have a husband who LOVES chocolate!  In fact, by his definition, if it's not chocolate it's not really dessert.  As a result I have quite the collection of chocolate treats.  This chocolate cake is my mom's (famous) chocolate cake made from scratch - no cheater chocolate cakes on the hubbies big day.  Ditto on the frosting.

FYI - despite the photo of my cake being two round cakes stacked, this cake is normally made in a 13x9 pan.  I did the cake rounds for fun but it was a disaster (the cakes stuck and tore, etc.)  Stick to the recipe and the 13x9 pan when you make it.

MOM'S CHOCOLATE CAKE     
(recipe from Linda W.)
printable version

3 cups flour
2 cups sugar
6 Tbs. cocoa
1 tsp. salt
2 tsp. soda
2 cups water
2 Tbs. vinegar
3/4 cup oil
2 tsp. vanilla

Combine all the dry ingredients in a mixing bowl.  Combine the liquid ingredients separately and then add to the flour mixture.  Mix until completely combined.  Pour prepared batter into a greased and floured 13"x9" baking pan.  Bake at 350 degrees for approx. 50 minutes or until it tests done.
Cool completely before frosting it with Chocolate Fudge Frosting.

Chocolate Fudge Frosting
1/2 cup cocoa
1/2 cup butter
1 tsp. vanilla
pinch salt
3 2/3 cups powdered sugar
1/4 cup + 1 Tbs. milk

Combine the butter and cocoa in a saucepan.  Melt the butter, bringing it to a boil.  Removing from heat and add the vanilla and salt.  Add the powdered sugar and milk, alternating until all the sugar is used and the frosting is of desired consistency.

Monday, May 23, 2011

Serving Up {Bread}: Polenta Bread


What can I say?  I love a fresh loaf of bread straight from the oven.  Warm, slathered with butter and paired with a soup or a salad (or another slice of bread!).  Perfect!

I have been making the same French Bread recipe for my entire marriage.  I don't even need to look at the recipe to make it anymore.  So I truly don't know what made me deviate from my norm one day, approximately two years ago, and try this bread recipe.  But I'm glad that I did.  Olive oil and corn meal are pretty peculiar ingredients for baked bread, and they are definitely a noticeable presence in this bread, but the end result is a remarkably soft bread that will have you reaching for a second (and third) slice.


POLENTA BREAD     

2 cups warm water
2 tsp. yeast
½ cup sugar
½ cup olive oil
½ cup polenta (or cornmeal)
2 tsp. salt
6 ½ cups bread flour

In a small bowl, dissolve the yeast and sugar in the warm water.

While waiting for the yeast to bubble and foam, get your stand mixer set up with a large bowl and dough hook accessory. Combine polenta, salt and flour in the mixer bowl. Add the olive oil and yeast mixture and mix well. Knead dough with dough hook for 8-12 minutes. Dough will be bubbly and light, but should not be too sticky. Turn off the mixer and let the dough rest for 1 minute in the bowl.

Divide the dough into thirds and shape into long loaves. Place on greased cookie sheets. Allow dough to rise in a warm location, until the loaves have doubled in size. Bake at 300 degrees for 30 minutes.

If a soft crust is desired, butter bread top as it comes out of the oven.
If a crustier crust is desired, omit the buttering of the top of the bread.

Friday, May 20, 2011

Serving Up {Pizza}: Pizza Roll Ups


I have been making these Pizza Roll Ups for as long as I have had kids.  I got the recipe from a class I went to that encouraged cooking for two days straight and then freezing everything.  I think it was called "freezer meals".  Although I loved the concept, it was a commitment that I couldn't keep up with after about the second 30 day stretch.  The truth is that I am HORRIBLE about remembering to pull out the next days meal 24 hours in advance.  So I let it go.

I haven't let this recipe go though.  My kids LOVE these.  I do find myself doubling (or even tripling) this recipe when I make it and then freezing the extras.  They make a great addition to a lunch box - talk about making your kid the popular kid at the lunch table!

The recipe is really just a general guideline.  You can alter it in innumerable ways.  Use wheat dough, add (hide) veggies, use a different meat (chicken or sausage anyone?), try a gourmet cheese.  You get the idea.


PIZZA ROLL UPS     Pin It
1 loaf frozen bread dough (I like Rhodes)
3/4 - 1 pound ground beef
2 cups shredded mozzarella cheese
1 cup pizza sauce
1 tsp. salt
1/2 tsp. pepper
2 tsp. Italian seasoning
1 Tbs. chopped fresh parsley
additional pizza sauce (for dipping)

Thaw dough and roll into a 14x24 inch rectangle about ¼ inch thick. Cook ground beef until brown. Drain fat and stir in the remaining ingredients. Spoon filling evenly over dough, slightly pressing the filling into the dough. Roll dough lengthwise like you are rolling a jelly roll and cut into 12 2-inch slices.
Spray cookie sheet with nonstick spray.  Lay slices on the cookie sheet, one inch apart.
Preheat oven to 400 degrees. Let roll-ups sit for 15-20 minutes to rise slightly.
Bake for 20-25 minutes or until golden brown.
Serve with pizza sauce for dipping if desired.

(variations: wheat dough, chicken, sausage, mushrooms, olives, chopped tomatoes, peppers, etc.)

Thursday, May 19, 2011

Serving Up {Breakfast}: Creme Brulee French Toast


How quickly can you get to the store and back?  Seriously!

This recipe was posted on my friends blog and it's like eating dessert for breakfast, or dinner as it is often served at our house.  The original recipe included a syrup (which I included the recipe for) but after the first time of making this, I just don't use.  Don't get me wrong.  I'm all about hyperglycemia, but the French Toast has so much sweet, yummy goodness that I don't feel that it needs any additional (sugar).  That said, it's not to say I don't make other additions.  I frequently add just a dash of fresh orange juice (and zest) to the egg mixture - it brightens the flavor ever so slightly.  My mom has also made it and added chopped pecans.  So yummy!

So go ahead and play around with it.  You aren't going to go wrong unless you don't make it :)


CREME BRULEE FRENCH TOAST     
(recipe from Kelli A.)
printable version

1/2 cup butter
1 cup brown sugar
2 Tbs. corn syrup
1 loaf Texas toast bread
5 eggs
1 1/2 cups half and half
1/4 tsp. salt
1 tsp. vanilla

In a small saucepan melt the butter, brown sugar, and corn syrup over medium heat until smooth, stirring occasionally. Pour mixture onto large, greased jelly roll pan and spread as needed to cover the entire surface. Place 12 slices Texas toast bread in a single layer to cover pan. Mix together the eggs, cream, salt, and vanilla. Spoon mixture over each piece of bread. Cover and refrigerate overnight. Bake uncovered at 350 degrees for about 30 minutes. Remove from pan and serve immediately. Flip bread over when serving so the brown gooey side is face up.

Magleby's Syrup
1 cup butter
1 cup white sugar
1 cup heavy whipping cream
1/2 tsp. vanilla

Bring butter, sugar and cream to boil and stir until sugar is completely dissolved. Remove from heat and add the vanilla.

Tuesday, May 17, 2011

Serving Up {Salad}: Honey Red Wine Vinaigrette

For Thanksgiving this past year I made a Candied Walnut Salad from the Sister's Cafe blog.  The candied walnuts, the blue cheese, the apples, the craisens - all SO yummy.  But what I really fell in love with was the Honey Red Wine Vinaigrette dressing.  I have made it a number of times since.  It is delicious regardless of what type of salad I am serving.

While I knew I was loving the dressing, my love affair was confirmed two weeks ago when we had a family from church over from dinner and the father of the family offered to drink the dressing plain.  Okay, so it wasn't just me :)  I would completely recommend the salad as a whole, but if you are like me and you create your salads based on what is in the fridge more than from following a recipe, then arm yourself with this dressing and transform your salad from "thrown together" to "exceptional".


HONEY RED WINE VINAIGRETTE     
(recipe from The Sisters Cafe)
printable version

1/2 c. red wine vinegar
1/2 c. honey
1-2 cloves garlic, pressed
1 tsp. Kosher salt
1 tsp. coarsely ground black pepper
1/2 c. canola oil

Place the first five ingredients in the blender and blend well.  Gradually add the oil and continue to blend until all the ingredients are incorporated and take on a dressing consistency.

Monday, May 16, 2011

Serving Up {Pasta}: Chicken Tortellini Bake


This is one of those recipes that at first glance may not grab your attention (and these photos do it NO justice, for which I apologize) but the flavors of this quick pasta dish are definitely memorable.  I don't know about you, but most nights our dinner hour is complicated - homework, scouts, piano lessons, chores, etc.  A recipe that can be put together in the morning and then put into the fridge until the dinner hour, when it's a quick pop into the oven to cook through, is a huge bonus in my book.

The tortellini, cheese and chicken are all child friendly ingredients.  The mushrooms may be a bit much for some children (or husbands) but they definitely add a flavor that knocks this dish out of the park!  The evening I took these photos I had actually made it without the mushrooms (an easy oversight at the market) but in the past I have used a variety of wild mushrooms, none of which have disappointed.  Get creative - even if you can only put the mushrooms in "your" corner of the casserole dish.


CHICKEN TORTELLINI BAKE     
(recipe from Mel's Kitchen Cafe)
printable version

16 ounce package of fresh cheese tortellini (the kind you find in the refrigerated section of the grocery store)
1 Tbs. oil
2 chicken breasts, cut up into bite size pieces
3 green onions finely chopped, white and green parts
2 Tbs. flour
1 cup chicken broth
8 ounces sliced fresh mushrooms
3/4 cup sour cream
2 cups shredded Monterey Jack cheese 
Bring a large pot of water to boil and cook tortellini for 2-3 minutes (this is if you use the “fresh” tortellini from the refrigerated section.  Drain and set aside.

Heat the oil in a large non-stick skillet over medium heat. Brown the chicken for 1-2 minutes and add the fresh mushrooms and green onions, cooking until chicken is done and mushrooms are golden brown. Sprinkle flour over mixture and stir to combine. Cook for 1-2 minutes. Add chicken broth and stir until thickened. Mix in sour cream until mixture is creamy and slightly thickened.

Spray a 9x13 pan with cooking spray. Pour the tortellini into the bottom of the 9x13 pan. Sprinkle half of the cheese over the tortellini. Put the cooked chicken/sauce mixture on top and the sprinkle the remaining cheese over the top.

Bake covered with tin foil at 350 degrees for 30 minutes.  Uncover and bake for an additional 15 minutes until bubbly and golden brown around the edges.

Friday, May 13, 2011

Serving Up {Cake}: Starbuck's Coffee Cake

How is it that you can take a cake, top it with sugar and butter, title it "coffee cake" and get away with serving it for breakfast?  I love this country!

In all seriousness, I don't believe I have ever eaten (this particular) coffee cake for breakfast.  When we make it, it is served after dinner as dessert.  Because this recipe uses a cake mix as it's base, it comes together very quickly.  In fact, it's easy enough that the last time we made it, my son was in charge and, based on the photos, I think you'd agree that he did a pretty good job!


STARBUCK'S COFFEE CAKE     Pin It
(recipe adapted from The Picky Palate)
printable version

1 box Yellow Cake Mix (plus ingredients listed on back to prepare)
1/2 cup sour cream

2 sticks cold salted butter
2 ¼ cups flour
1 ½ Tbs. cinnamon
1 ¾ cups brown sugar
1 ½ Tbs. vanilla
Powdered sugar (for dusting)

Preheat oven to 350 degrees.

Prepare cake mix in a large bowl according to directions on the box, adding 1/2 cup sour cream. Spray a 9x13 pan with non-stick spray. Pour prepared mix into pan and bake at 350 degrees for 15-20 minutes or until center is barely set.

While cake bakes, prepare crumb topping by mixing butter, flour, cinnamon, sugar and vanilla with an electric mixer until crumbly.

Immediately after cake is removed from oven, break crumb topping into marble size pieces, sprinkling over the top of the cake. Put the cake back in the oven and bake an additional 10-15 minutes (topping will look a little less wet/raw). Let cool completely then dust with powdered sugar.

Cut into squares and serve.

Thursday, May 12, 2011

Serving Up {Bread}: Homemade Wheat Bread


I know carbs have a bad reputation and, as of late, there is a lot of talk about gluten and gluten-intolerance.  I almost feel like this is not a politically correct recipe, but then I'm reminded that this blog is my recipe collection and so post I will!  I will stand up for the loaf of bread and declare, "I am not afraid of carbs".  Okay, I am scared of the white carbs that come in the form of bread loafs at the store that contain 32 ingredients of which I can only pronounce four...  But this is not that loaf!

Three years ago I went to a bread making class at my church and this is the recipe that I learned to make.  We learned about grinding our own wheat and using it while it was fresh because of the nutritional value that freshly ground wheat contains.  We were reminded that we have been taught (here) that grains were meant for our consumption.  I have been making homemade bread, this recipe specifically, ever since.  I will admit that since our move I have not made it as often as I would like, but up until our move I made this weekly and stopped purchasing store bought bread altogether.  This isn't 100% whole wheat, but it does make a light enough loaf that my kids will happily eat it and it is sturdy enough to not tear when using it for sandwiches.  Oh, and it's mighty tasty when it's hot out of the oven and it melts the pat of butter that you smear across it!


HOMEMADE WHEAT BREAD     
(recipe from Erin B.)
(printable version)

This recipe is for a 4-6 quart mixing bowl. It can be easily doubled for a larger capacity bowl.

First, grind 4 cups wheat berries. This will produce 6 cups flour.

Place the following ingredients in bowl:
3 cups warm water
½ cup oil
½ cup honey
2 ½ cups freshly ground flour, or enough to cover the top of the other ingredients.

Mix with a paddle attachment on speed 1 only until flour is wet. Then add:
1 ½ T SAF instant yeast.

Mix briefly, about 15 seconds. Put a dry towel over the bowl and let dough sponge for 15-20 minutes. Now add:

1 Tbs. sea salt
¼ cup vital wheat gluten
½ cup powered milk
1 heaping T dough enhancer
Remainder of freshly ground flour.

Mix with dough hook on speed 1 or 2 for a few (3-5) minutes.

Next, add white (store bought) flour to the mixture until the sides of the mixing bowl are wiping clean from top to bottom. Continuing to add flour will make your bread dense and heavy. Your bowl will do the hard part for you if you pay close attention. Start with 2 ½ cups; you generally won’t add more than 3 cups. At this point your bread will still look very sticky.

When you’ve added enough white flour, knead with dough hook on speed 2 for about 10 minutes. You’ll be able to tell that you’ve kneaded enough when you can pull your dough without it ripping easily. It also will no longer be sticky. The gluten will have formed enough that it will appear shiny and elastic.

Crisco your hands and counter top or cutting board, and dump dough onto work surface. Cut into three equal portions. Form loaves by allowing the dough to fall over your fingertips with your thumbs on top. Once you’ve formed a large circle, place the dough on counter and, with your palms up, squeeze inward with the pinkie sides of your hands while rotating in a circle. This will form a nice oval shaped loaf. Place in greased pans.

Place loaf pans on a cutting board or wire rack. Cover with dry towel and let double in size. This usually takes 30-60 minutes.

Bake in preheated oven at 350 degrees for 27-30 minutes. If loaves are getting too brown, tent with tin foil.

Once out of oven, remove from pans and cool on a wire rack. If desired, rub tops of hot bread with butter or shortening, or spray with Vegalene for a shiny appearance.

Do not place in bags until completely cool. Never freeze until completely cool.

When thawing, microwave single loaf on high for 2 ½ minutes.

Tuesday, May 10, 2011

Serving Up {Fruit}: Mallow Fruit Dip

I served this fruit dip at our family gathering on Easter Sunday.  My sister-in-law commented that the fruit platter might be the only thing her daughter would eat and referred to it as "Vitamin fortified sugar".  I liked that description.  If you also have fruit lovers, and you want to further detract from the vitamin fortification of the fruit, this is a great way to accomplish that :)

This is a recipe that was in my mom's recipe box when I was growing up.  However, it seems like it was always reserved for special occasions (like Easter) and I always wished it was made more often.  It comes together so quickly that there is really no reason to not serve it more frequently.  It makes a great accompaniment to fruit for a baby or wedding shower or even a church gathering.  With summer approaching, and fresh fruit making it's way to our table, this is a fun way to dress it up a bit.


MALLOW FRUIT DIP     
(recipe from Linda W.)

8 ounces cream cheese
7 ounce marshmallow cream
1 Tbs. fresh orange juice
1 tsp. grated orange peel
dash ground ginger

Soften the cream cheese in a medium bowl.  Add the remaining ingredients and mix well.  Refrigerate until ready to serve.  Serve with assorted fruit.

Monday, May 9, 2011

Serving Up {Muffins}: Pumpkin Muffins


Sunday mornings are Muffin Mornings at our house.  They have been for a couple of years now and the kids don't let me forget!  While we have tried many different recipes, and are always on the lookout for a new muffin recipe to try, pumpkin muffins are one of the most frequently requested.

This recipe is a combination of two different recipes that I merged into one.  It's our favorite but I never seem to let it alone.  The kids never know from one Sunday to the next what I am going to "experiment" with and add this time.  We have had success with adding shredded coconut and, of course, chocolate chips are always a big hit.  If you are lucky enough to live near a store that stocks Hershey's Cinnamon Chips (I have bought them by the case on amazon.com) you must try adding them to this recipe.  It's definitely our favorite pumpkin muffin addition to date!


PUMPKIN MUFFINS     
printable version


2 2/3 cups flour
2 cups sugar
2 tsp. baking powder
1 1/2 tsp. baking soda
1/2 tsp. salt
3 tsp. cinnamon
1 tsp. ginger
1/2 tsp. nutmeg
1/2 tsp. ground cloves
4 eggs, slightly beaten
2 cups pumpkin puree
1/2 cup butter
1/2 cup coconut oil (use cooking oil if you don't have coconut oil on hand)

Preheat your oven to 350 degrees.  Prepare 24 full-size muffin cups.
Combine the dry ingredients in a large bowl and sift together.  In a separate bowl combine the wet ingredients and whisk until well combined.  Pour liquid into the dry ingredients and mix until well moistened, but don't over mix.  If adding chocolate chips stir in at the end.
Fill muffin cups 2/3 full.  Bake for 20-25 minutes or until they test done.

Friday, May 6, 2011

Serving Up {Vegetables}: Roasted Asparagus

I love spring...when there is so much fresh produce in the markets.  Asparagus is one of those spring delights that I look forward to.  I have always loved asparagus but up until a couple of years ago I didn't make it very often.  Then I discovered roasting it to prepare it, and while it's not nearly as pretty as when it is steamed, it is SO good.  It is not uncommon for me to have roasted asparagus for lunch a couple of times a week when it is in season.  I know you're jealous!  Give it a try and you will be surprised at how easy (and yummy) it is.


ROASTED ASPARAGUS     

1 bunch of asparagus spears
olive oil
balsamic vinegar (optional)
sea salt
freshly ground pepper
Parmesan cheese

Heat the oven to 425 degrees.
Wash the asparagus and break the tough ends off.  Place on a foil lined baking sheet in a single layer.  Drizzle with olive oil and then balsamic vinegar (or use a balsamic dressing in place of both the oil and vinegar).  Roll the spears around until well coated.  Sprinkle with sea salt and freshly ground pepper.  
Bake for 20-25 minutes until they are tender but still crisp.
Grate fresh Parmesan cheese over the top as soon as they come out of the oven and allow to sit until the cheese melts.

Thursday, May 5, 2011

Serving Up {Brownies}: Favorite Mint Brownies

I pride myself in the fact that I have never met a brownie that I haven't instantly become friends with. I'm a brownie kind of girl. And although I love brownies in all their forms, I have a special fondness for mint brownies. And I'm not the only one - I became kind of well known in our previous ward for "Katherine's mint brownies" - they were requested at more than one baptism and the bishop offered them one year in ward council as a reward for ward history submissions.  Most ward history submissions ever!

This is one of those recipes that came with me when I moved out of my mom's house. Since that time I have enjoyed a fair number of mint brownies and have tried a number of other recipes. And while I have enjoyed most of them, none have beat this recipe. It is definately my "go-to" mint brownie recipe.

 
FAVORITE MINT BROWNIES     
(recipe from Pam H.)
printable version

6 eggs
3 cups sugar
1 1/2 cups butter, melted
1 tsp. vanilla
3/4 cup cocoa
2 1/2 cups flour
1 tsp. baking powder
3/4 tsp. salt

In a large mixing bowl, blend eggs until bright yellow in color.  Gradually add the sugar; mixing until well combined.  Next add the melted butter and vanilla.  Combine dry ingredients and sift together and then add to the wet mixture and stir until combined.  Spread into a greased 12x17" pan.  Bake at 350 degrees for 20-25 minutes, being careful not to over bake.  Cool on a wire rack.

Mint Filling:
1/2 cup butter, softened
3-4 Tbs. evaporated milk
3 1/2 -4 cups powdered sugar
1/2 - 3/4 tsp. mint extract
food coloring

Beat the butter until soft and then alternate adding the milk and powdered sugar until all the powdered sugar is used (may use additional milk if necessary).  The texture needs to be that of a spreadable frosting so that it doesn't tear the brownies.  Add mint extract to taste and food coloring of your choice.  Spread over cooled brownies.  Chill.

Chocolate Glaze:
1/2 cup butter
1 1/2 cup chocolate chips
1 tsp. vanilla

Combine the butter and chocolate chips in a small saucepan over med-low heat until melted; stirring frequently.  Remove from heat and stir in vanilla.  Let cool slightly before pouring over chilled mint layer of brownies.  Spread carefully.  Allow to cool completely before cutting.

**These brownies freeze really well so they are great for making ahead of time.

Wednesday, May 4, 2011

Serving Up {Mexican}: Cream Cheese Enchilada

Tomorrow is Cinco Di Mayo.  Have you got your Mexican Menu planned?  If not, may I suggest (very humbly) these delicious enchiladas?  I promise you that you will plan to only eat one, but you will find yourself reaching for another.  It happens EVERY time I make them.  I know, I know, I need to work on my will power - but that takes will power that I just don't have.  A vicious cycle!

I generally double this recipe for two reasons - first is that they are so good you will simply want twice as many. Secondly, I dislike recipes that call for anything less than 8 oz. of cream cheese because any leftover will just go bad in my fridge. So I double this recipe for ease and just use one block of cream cheese.

I am going to put in a plug here for the tortillas from Costco that you cook yourself.  They make ANY tortilla recipe better.  It's the only tortilla I buy anymore and the only tortilla I have used to make these enchiladas.

I will mention that this recipe originally called for a red salsa.  I have never made it with red salsa.  I prefer salsa verde and so that is what I used when I made it the first time and that is how I have made it ever since.  It's delicious and I can't imagine red salsa would improve it any.  But just in case you aren't a salsa verde person, feel free to go for red salsa and let me know how it is...


CREAM CHEESE ENCHILADA     
(recipe adapted from Cassie Craves Blog)
printable version

5 oz. cream cheese, softened
1/4 cup sour cream
2 cups salsa verde
1 cup shredded cheddar cheese, divided
1 cup shredded pepper jack cheese, divided
2 cups cooked chicken, shredded
1 cup frozen corn kernels, thawed
1/2 tsp. chili powder
1/4 tsp. cumin
Salt and pepper
4 scallions, thinly sliced
8 tortillas

Preheat the oven to 325 degrees.
In a medium bowl cream together the cream cheese and sour cream.  Stir in 1/2 cup salsa and 1/2 cup of each type of cheese.  In a second bowl combine the chicken, corn, cumin, chili powder, salt, pepper and half  of the scallions.  Add the chicken mixture to the cheese mixture and stir until well combined.
Spread about 1/2 cup of salsa in the bottom of a baking dish.  Place 1/3 to 1/2 cup of the filling on a tortilla; roll up and put in the dish seam side down.  Repeat the process for the remaining tortillas.
Pour the remaining salsa over the enchiladas, spreading it to cover all of them.  Sprinkle with the remaining cheese.
Bake in preheated oven and bake for 20-25 minutes, until hot and bubbly.  Sprinkle with remaining scallions prior to serving.