Friday, April 29, 2011

Serving Up {Cookies}: Todd's Chocolate Chip Cookies

I first tasted these cookies 14 years ago (yes, I still remember the first time I tasted them) and I did not leave the family gathering until I had a guarantee that the recipe would be on it's way.  These cookies have been with me ever since.  They darn near got me a marriage proposal when I mailed them to a friend who took them to work - he was encouraged by a colleague to marry whoever had made these cookies.  Ha!  These cookies also came in handy when on a road trip to visit another friend (who I DID actually get a marriage proposal from and accepted) and I needed three tires replaced at 2 a.m.  I'm not sure what the tow truck driver thought of the two 23 year old girls offering him a plate of cookies at that hour.  These cookies have seen some good times!

But even if you are not in need of a marriage proposal or a tow truck, this is a good recipe to have in your recipe box.  The recipe calls for "chocolate chips and nuts".  Just for the record, every time I have had the "ooh la la" response I have used white chocolate chips and pecans.  But that is not to say that they aren't pretty darn good with milk chocolate morsels.

The key to making these cookies is in the beating of the butter and sugar.  Use a good stand mixer and be patient.  When it says to beat the butter and sugar for five minutes, it means five minutes.  It makes all the difference.  The other key is letting the dough sit overnight before baking them.  I don't know why, but if you bake them without chilling the dough the cookies are flat and unimpressive.  Wait 24 hours and bake the dough after it's chilled and they are soft and chewy and thick and...will you marry me?


TODD'S CHOCOLATE CHIP COOKIES     
(recipe from Todd P.)
printable version

1 lb. butter (4 sticks)
2 cups brown sugar
1 1/2 cups white sugar
3 eggs
2 Tbs. vanilla
6 cups flour
2 tsp. soda
1 1/2 tsp. salt
4 cups chocolate chips (white is my preferred with this recipe)
2 cups nuts, optional (pecan chips are perfect)

*This recipe makes a lot - which is how I like to make cookies.  If you don't really need 10 dozen cookies, feel free to cut the recipe in half.

In a large mixer stand bowl, cream together the butter and the brown and white sugar until light and airy.  Add the eggs and vanilla and cream an additional FIVE minutes; scrapping down the sides of the bowl as needed.  Sift together the dry ingredients and add gradually to the butter mixture until all is incorporated.  Add chocolate chips and nuts last.
Chill the dough overnight.  When ready to bake, place on a greased cookie sheet and bake at 350 degrees for 8-10 minutes.  Do not over bake!

Thursday, April 28, 2011

Serving Up {Chicken}: Chicken Tikka Masala


Every time I make this recipe I wonder why it is that I don't make it more often.  Like, maybe weekly!  It is just SO good!
I was reminded again how good when I made it a couple of weeks ago...
Good enough that I took seconds even though I was completely full.  I just wanted some more of that Indian goodness in my mouth.
Good enough that my husband ate some of the leftovers for breakfast the next morning - breakfast!
Good enough that I ate the rest of the leftovers for lunch the next day (I am not generally a leftover person).
Good enough that my husband declared it "probably the best chicken I'd ever made!"  (Have I ever mentioned my husband lived in the West Indies for two years?  He knows his Indian fare.)
Enough said.


CHICKEN TIKKA MASALA     
1 cup plain yogurt
1 Tbs. lemon juice
2 tsp. ground cumin
1 tsp. cinnamon
1/2 tsp. cayenne pepper
1 1/2 tsp. paprika
2 tsp. black pepper
1 Tbs. minced fresh ginger
1 tsp. salt
3 boneless, skinless chicken breasts, cut into thin strips or chunks

Combine all ingredients except the chicken. Pour the sauce over the chicken and refrigerate for one hour or up to 8 hours. Grill or cook chicken in frying pan; discarding the marinade.

1 Tbs. butter
1 clove garlic, minced
1 jalapeno pepper, finely chopped (add more if you like heat)
2 tsp. ground cumin
2 tsp. paprika
1/2 tsp. salt
8 ounces tomato sauce
1 cup cream
1/4 cup chopped fresh cilantro

Melt the butter in a large skillet over medium heat. Saute garlic and jalapeno for one minute. Season with cumin, paprika and salt. Stir in the tomato sauce and cream. Simmer on low heat until sauce thickens, about 20 minutes. Add the cooked chicken and simmer for 10 minutes.
Garnish with fresh cilantro. Serve over hot rice.
Add some Roti (Costco) or Indian Naan (Trader Joes) for an authentic touch.

Wednesday, April 27, 2011

Serving Up {Soup}: Orange Tortilla Soup

 
I love to warm up with soup. Problem is, we lived in Las Vegas for nine years. Count em - nine years of "not really soup" weather. Don't get me wrong - I am not complaining about Vegas' perfect weather (yes, it is perfect). It's more of an opportunity for me to look on the bright side of our cold, wet days in Oregon by acknowledging that I now have a reason to pull out all of my soup recipes and put them to good use.

Tortilla Soup is a favorite of mine. It comes together super fast or can even be prepared in a crock pot and allowed to simmer all day. It's also one of the few (only?) soups that all four of my kids will eat.  Maybe if I served tortilla chips with all soups then all soups would be better received...

This recipe comes from The Sister's Cafe blog. While most Tortilla Soup recipes are just a variation upon a common theme (pull out the can opener) this recipe uses chicken and does not have canned beans.  Something about the lack of canned ingredients, and the subtle citrus taste from the orange juice, made me feel like this was a bit fresher, maybe even healthier. Oh, and most importantly, it passed the kids test!

If you are looking for a new twist on an old favorite, give this one a try.


ORANGE TORTILLA SOUP     
(recipe from The Sisters Cafe)
printable version

1 Medium yellow onion, chopped
1 Clove Garlic, minced
4 Celery Stalks, sliced
3 Tbs. Vegetable Oil
2 ½ cups Chicken Broth
1 ½ cups Orange Juice
1 14 oz. Can Tomato Sauce
1 cup Water
1 4 oz. can Diced Green Chilies
1 Tbs. Chopped Cilantro
½ Bag Matchstick Carrots ( I used diced)
2-3 Chicken Breasts

Grated Pepper Jack or Cheddar Cheese
Tortilla Strips/Chips
Sour Creams
Avocado

In large pot sauté onion, garlic, celery, and carrots with oil until onions are translucent.  Add broth, orange juice, water, and tomato sauce, cilantro, and chilies and simmer until vegetables are tender.
While soup is simmering pan fry or grill the chicken breasts with taco seasoning (optional), then shred or dice (I prefer diced) into small pieces. Add to the simmering soup.
Add your favorite toppings. Enjoy!

Tuesday, April 26, 2011

Serving Up {Drink}: Orange Frostie

Earlier this month I was at the mall, which NEVER happens.  I ended up in the food court, which happens even less than me being at the mall!  Go figure!  I went to Orange Julius and they have expanded their menu to include many more flavors than just orange!  I decided to try their "Mango Passion" and it was really refreshing and yummy.

The following week we were enjoying some nice, sunny days and I decided to re-create the drink for my kids for their after-school snack.  I used my recipe for "Orange Frostie" and made a few variations.  The end product was a hit with the kids, which shouldn't surprise anyone.  My kids are so used to Green Smoothies that to be served a drink without a single vegetable, they were bound to be excited.

So here you go, my Orange Julius knock-off...


ORANGE FROSTIE     

1/2 cup sugar
1 1/2 cup milk
1/4 cup powdered milk (optional)
1 tsp. vanilla
6 oz. can frozen orange juice concentrate ***
1 tray of ice cubes, crushed

Put all the ingredients into the blender and blend on high until all the ice is crushed and the ingredients well mixed.

***For my Mango re-creation I used a can of DOLE Orange-Peach-Mango in place of the orange juice concentrate.  I also replaced 1/2 of the ice cubes with chunks of frozen Mangos (purchased at Trader Joe's).

Monday, April 25, 2011

Serving Up {Breakfast}: Chunky Monkey Pancakes

I admit that we eat breakfast foods at our house frequently for dinner.  I love breakfast foods, but at times it's hard to find time in the hectic morning routine to try out new (often complicated) breakfast recipes. That and, well let's admit it, kids like breakfast foods. Try out a new dinner entree and everyone complains! Try out a new pancake variation and they line up with plates in hand.

This recipe was truly stumbled upon in error. I had made a menu list for three weeks out and bought all the ingredients. In my hurry to prepare dinner one night I glanced at my list and saw "Peanut Butter Chocolate Chip Waffles" written.  But somehow between reading the menu and getting to my computer to find the recipe it had become "Banana Chocolate Chip Pancakes". I didn't even realize my mistake until halfway through making the pancakes when I couldn't figure out why I had bought chunky peanut butter when the recipe I was making didn't even call for chunky peanut butter. (The waffles do call for for chunky peanut butter and can be found here).  It turned out to be a lucky error for us because these were really good. Make that REEAALLYY good!


CHUNKY MONKEY PANCAKES     Pin It
{Banana Chocolate Chip Pancakes with Peanut Butter Syrup}
(Recipe from Our Best Bites)
printable version

1 1/2 cup flour
3 Tbs. sugar
2 tsp. baking powder
1 1/2 tsp. baking soda
1/4 tsp. salt
1 1/2 cup buttermilk (buy the real stuff - SO much better)
1 tsp. vanilla extract
1 Tbs. canola oil
1 egg
2 small-med ripe bananas
1/4 cup mini chocolate chips (or regular chips roughly chopped)
Cooking Spray or butter for pan

1 C maple syrup
1/2 C peanut butter

Combine flours, sugar, baking powder, baking soda, and salt in a mixing bowl and whisk together. In a separate bowl combine buttermilk, eggs, oil, and vanilla and whisk well. Add the wet ingredients into the dry and mix just until moistened and combined. Place bananas in a bowl and roughly mash with a fork. Fold into batter. Add the chocolate chips and stir.

For syrup, heat peanut butter in the microwave for 30 seconds. Add maple syrup and gently whisk to combine. Heat in the microwave for another 30 seconds, whisk, and then set aside.

Heat a nonstick griddle or skillet to medium heat. Coat pan with little butter and then pour on pancake batter. Wait until bubbles form and edges are set and then flip.

Reheat syrup if necessary and pour over warm pancakes.

Friday, April 22, 2011

Serving Up {Salad}: Sandy's Spinach Salad


In my husband's family, if you say you are bringing "Sandy's Salad" everyone knows exactly what you are speaking of.  Which is pretty remarkable because I can't think of another recipe that needs no introduction or explanation.  Sandy happens to be my sister-in-law and this recipe is her spinach salad that I make more than any other salad.  The ingredients seem to always be on hand so it's quick to throw together without any aforethought - yet the taste would make you believe that it was labored over.


SANDY'S SPINACH SALAD     
(recipe from Sandy D.)
printable version

Spinach leaves
Sliced tart apple (granny smith)
Crisp bacon bits
Toasted slivered almonds
Dried sweetened cranberries
Shredded parmesan

Combine all the salad ingredients in a large bowl.

Poppy Seed Dressing:

3/4 cup sugar
1/3 cup apple cider vinegar (or raspberry vinegar)
1 tsp. dry mustard
1 Tbs. dry onion flakes
1 tsp. salt
1 cup canola or olive oil
1 Tbs. poppy seeds

Mix the first five ingredients in a blender until sugar dissolves.  Slowly add the oil while continuing to blend.  Add the poppy seeds last.
***The dressing proportions make A LOT of dressing - I always cut it in half and still have leftover.

Thursday, April 21, 2011

Serving Up {Bread}: Grandma's Banana Bread


When I set out to start blogging my many recipes, I really wanted to remember the history behind some of my recipes.  This is one such recipe.  This is my grandmother's recipe for banana bread.  I don't have any one specific memory associated with my grandmother and this bread, but something about knowing it was her recipe has made this a cherished possession of mine.  She passed away shortly after I married and as I began my married life, I wished that I had thought to get more of her recipes.  It's a sad thought to think that those are lost forever.  So here is an encouragement to call up a family member and ask them for a recipe for something that they make that you love.  It's a little piece of them that you will have forever.

Onto the recipe.  I really like anything banana - bread, muffins, cakes, cookies.  I have recipes for them all.  Of all the recipes I've made, this is the only one that I have ever come across that has you dissolve baking soda in hot water before adding it to the ingredients.  I failed chemistry (okay, I got a B) so I have no idea what that step does, but for as moist as this banana bread is, I have never dared to do it any way other than directed.  Let me know if you agree. 


GRANDMA'S BANANA BREAD     Pin It

(recipe from Grandma Wright)
printable version

1/3 cup shortening (I use butter, but the shortening was my grandma!)
1 cup sugar (I frequently reduce it by 1/3 cup with no noticeable difference)
1 egg
3 bananas, well ripened and mashed
1 1/2 cup flour
1/2 tsp. salt
1 tsp. baking soda dissolved in 1/3 cup boiling water

Cream butter and sugar together until well mixed.  Add egg and banana and continue to mix.  Add flour and salt and mix until well combined.  Add the soda dissolved in boiling water LAST.  Pour batter into a greased loaf pan.  Bake at 350 degrees for approximately 1 hour - test it with a toothpick at 55 minutes.
Cool completely and store in the fridge.

Wednesday, April 20, 2011

Serving Up {Cake}: Strawberry Cream Cake

In case you are wondering if this cake tastes as good as it looks, the answer is "it tastes even better!".  I made this just two weeks ago for Sunday dessert and I'm already thinking I want to make it again after uploading these photos.  With the fresh strawberries available right now, this is the perfect time to enjoy this delectable treat!

This is one of those recipes that my mom is "known" for.  I'm pretty sure that she has included it in every ward cookbook she has ever submitted to and even though she happily shares the recipe, people still request her to make it.  I have to agree that as good as this recipe is, it does taste better when mom makes it :)

There is nothing complicated about the recipe, but you do need to allow for some cooling and the setting of layers, so plan ahead.  You will be so glad that you did!


STRAWBERRY CREAM CAKE     Pin It
(recipe from Linda W.)
printable version

1/2 package white cake mix
1 egg
3/4 cup water
2 Tbs. flour
Mix together the ingredients and blend on high for 2 minutes.  Pour into a greased and floured 13"x9" pan.  Bake at 350 degrees for 20-25 minutes or until done.  Cool completely.

8 ounce cream cheese
2 cups powdered sugar
1/2 pint whipping cream
Beat the whipping cream on high until soft peaks form.  Set aside.  Beat the cream cheese until smooth and then gradually add the powdered sugar.  Gently fold in the whipped cream until well incorporated.

Spread over the cooled cake and refrigerate.

1 quart fresh strawberries (slice and sprinkle with 1/4-1/2 cup sugar and allow the juices to run)
-OR-
2 packages frozen strawberries (thaw and save the juice)
1 package Danish Strawberry Dessert (found near the jello desserts)
Mix the Danish Dessert using 1 3/4 cup liquid - use strawberry juices and additional water to make up the difference.  Cook according to package directions.  Cool completely before adding the berries.

Gently spread the berry mixture over the cream cheese layer of the cake.
Refrigerate for 4 hours before serving.

**This recipe can also be made using raspberries and is a yummy variation.

Tuesday, April 19, 2011

Serving Up {Soup}: Chilled Raspberry Soup

It's hard to believe that Easter is just around the corner.  Partly it's hard to believe because I'm not sure how it became April so darned quickly and partly it is because I'm used to warm (Vegas) spring days preceding Easter.  It's just too cold here in the Northwest to lay any claim on spring just yet.

I may still be stuck in cold "soup weather", but hopefully you are not and you are open to a recipe for a refreshing Chilled Raspberry Soup.  It would make a beautiful addition to your Easter menu, if you are still in the planning phases of trying to decide what to serve.

This soup is super easy to put together and can be made beforehand - in fact I like it better the day after it's made because the flavors have a chance to blend together.  My sister-in-law served this as part of her wedding reception buffet - which was held outside on a beautiful June evening.  I wasn't counting, but I'm pretty sure that a large number of guests went back for seconds :)  Most recently my mom and I served it at a baby shower for my brother's wife - we were welcoming twin girls and wanted as much "pink" as we could get in the menu!  This soup was perfect for both events and if you don't serve it at Easter, definably consider serving it for Mother's Day.  It just fits the bill when you are looking for something that says "spring", "light" and "luscious"!


CHILLED RASPBERRY SOUP     Pin It
(recipe from Sheri D.)

1 cup Cran-Raspberry juice
1/2 cup sugar
1 1/2 tsp. cinnamon
1 Tbs. lemon juice
3 whole cloves
32 ounce container raspberry yogurt
16 ounce container sour cream
1 pkg. fresh or frozen berries

Stir together the juice, sugar, cinnamon, lemon juice and cloves in a small saucepan until the sugar has dissolved.  Warm over medium-low heat and allow to simmer for 15 minutes to allow the spices to release their flavors.  Remove from heat and strain out the whole cloves and put the juice in the refrigerator to chill.  Once chilled through, add the yogurt and sour cream and whisk until well combined.

When ready to serve, garnish each serving with fresh or frozen berries on top.

Monday, April 18, 2011

Serving Up {Pasta}: Spinach Artichoke Stuffed Shells


I posted this recipe on our family blog three years ago because every time I made it I would get the request for the recipe.  Nothing has changed.  It continues to be one of my favorite meals to make and continues to get requests for the recipe whenever it's shared.  Because it is so well received, it is one that I often go to when I need to provide a dinner for another family - not to mention it is an easy recipe to double if you need to feed a large crowd.

Don't be frightened by the spinach.  My husband is not a big fan of cooked spinach and yet I have never had him voice displeasure in it's presence in this meal (as he reaches for seconds).  If you are really adverse to it, then simply leave it out.  They will still be amazing! 

SPINACH ARTICHOKE STUFFED SHELLS      
(adapted recipe from Karen S.)
printable version

1 pkg. jumbo shells
1 can artichoke hearts (not marinated), chopped
1/2 cup frozen CHOPPED spinach (about 1/2 package), thawed and well drained
8 oz. cream cheese, softened
1/4 cup sour cream
1/4 cup mayonnaise
Dash each of Worcestershire sauce, garlic powder and pepper
1/4 tsp. salt
1 lb. jimmy dean sage sausage, cooked and drained

Cook pasta until almost done - they are easier to stuff when not completely cooked.  Set aside.

Combine the cream cheese, sour cream, mayonnaise and spices and blend together well.  Add the spinach, chopped artichokes and sausage and stir until all mixed.

Stuff the shells with the cream cheese mixture and place in a lightly sprayed baking dish, open side up.  Top with alfredo sauce (recipe to follow) and bake until heated through.

ALFREDO SAUCE
(recipe from Karen S.)

1/4 cup butter
1 quart HEAVY whipping cream
1 cup parmesan shreds

Melt the butter in a saucepan, being careful to ensure it does not burn.  Add the whipping cream and heat over medium-low heat until it thickens (at least 5 minutes) stirring frequently.  Add a little salt and pepper.  When the sauce is thickened, add the parmesan cheese and stir until it is melted and incorporated.  Do not add the cheese prior to the cream thickening or the cheese will sink to the bottom and burn.  Taste and add additional salt if necessary.

The Alfredo Sauce recipe makes enough that I generally only use 1/2 of the recipe to top one batch of the stuffed shells.

Friday, April 15, 2011

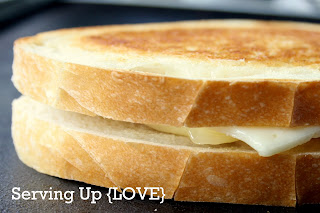
Serving Up {Sandwich}: The Ultimate Grilled Cheese

After posting my recipe for Parmesan Tomato Basil Soup, it only seems reasonable that I ought to follow it with this recipe for an amazing grilled cheese sandwich.  "Grilled cheese?" you ask.  And I say "yes" - there is a recipe to follow when you want to make Knock Your Socks Off Grilled Cheese.  Perfectly paired with a cup of tomato soup or enjoyed by itself, this is Grilled Cheese taken to the next level.


THE ULTIMATE GRILLED CHEESE SANDWICH     Pin It
Sliced Havarti cheese
Sliced Fontina cheese
Fresh Mozzarella cheese
Fresh Basil
Honey
Sourdough Bread
Tomato**
Butter

Generously butter one side of two slices of sourdough bread (I've tried wheat bread and french bread - sourdough is my favorite in this recipe).  Then on one slice of bread, on the non-buttered side, generously slather honey.  I vary on this step from my friends directions, but I promise that when you put the honey directly on the bread it heats up on the grill and crystallizes to add a subliminal crunch that adds to the delight of this sandwich.  Place one slice of bread, buttered side down, onto a pre-heated grill.  Top with one slice of Havarti cheese and one slice of fontina cheese.  Place the other slice of bread, buttered side down, onto the grill and layer it with fresh mozzarella slices, sliced tomato and fresh basil.  When the cheeses are melted, and the bread adequately toasted, remove and combine both slices for a sandwich that is out of this world.

** This sandwich is awesome even without tomato if you aren't sure about that addition.  A favorite variation of mine is to replace the tomato and basil with a scoop of Trader Joe's jarred Bruschetta - same flavor taken to the next level!  If you don't live near Trader Joe's, please consider moving - this is just one of MANY of their products that find their way into my pantry as a staple.

Wednesday, April 13, 2011

Serving Up {Soup}: Tomato Basil Parmesan Soup

I love soups.  I really love soups.  I have been known to serve soup in July in Las Vegas - not because it was cold but because I was simply craving soup.  Now that we are living in the Northwest we have more "soup weather" days which I have been taking advantage of.  There is nothing like a yummy, warm bowl of soup and some crusty bread smeared thick with butter.  Perfect meal in my book!

I had a favorite homemade Tomato Soup recipe for a number of years, yet I am guilty of trying new recipes even for things that I already have a "perfect" recipe for.  That is how I stumbled onto this recipe.  I marked it because I liked the idea that it was a slow cooker recipe - yet the first time I made it I hadn't left enough time to utilize the crock pot so I made it on the stove.  It was LOVE at first bite.

The only thing that I have been known to do differently (other than I usually make it on the stove top) is to put small batches of it into my blender when it is all done and blend it down so that no chunks remain.  I personally am a fan of the chunks but I get outvoted by the masses at my house, so the chunks have to go.  If you choose to do the same, be aware that if the soup is too hot when it is put in the blender it tends to "explode" in the blender.  So only put a cup or two into your blender at a time.  It takes a bit longer but in the end is it's a better option than cleaning tomato soup from cupboards and the ceiling - ask me how I know :)


SLOW COOKER TOMATO BASIL PARMESAN SOUP     Pin It
(recipe from Good Things Utah)
printable version

2 (14 oz) cans diced tomatoes, with juice
1 cup finely diced celery
1 cup finely diced carrots
1 cup finely diced onions
1 tsp dried oregano
1 Tbsp. dried basil
4 cups chicken broth
½ bay leaf, ½ cup flour
1 cup Parmesan cheese
½ cup butter
2 cups half and half, warmed
1 tsp salt
¼ tsp black pepper

Add tomatoes, celery, carrots, chicken broth, onions, oregano, basil (if using fresh oregano and basil, if using dried oregano and basil add it in the last hour of cook time), and bay leaf to a large slow cooker. Cover and cook on LOW for 5-7 hours, until flavors are blended and vegetables are soft. About an hour before serving prepare a roux. Melt butter over low heat in a skillet and add flour. Stir constantly with a whisk for 5-7 minutes. Slowly stir in 1 cup hot soup. Add another 3 cups and stir until smooth. Add all back into the slow cooker. Stir and add the Parmesan cheese, warmed half and half, salt and pepper. Cover and cook on LOW for another hour until ready to serve. Serves 8.

Monday, April 11, 2011

Serving Up {Cake}: Gooey Butter Cake

 
Disclaimer right off the bat - these are more of a "bar" than a true cake.  But please don't let that deter you.
I admit that this is one of those recipes that you can google search and find hundreds of variations for, which is remarkable considering that this recipe only has six ingredients.  But then again, in my hunt for a St. Louis Gooey Butter Cake I went for the "cheater" recipe - the one that uses a box mix as part of the ingredient list, resulting in a significantly quicker end product.  Believe me, you are going to be glad to get to the end product quickly too!  But if for some reason you are opposed to quick and easy when it comes to your desserts, you can search out a more labor intensive recipe...in fact here is one that I still have in my archives to make.  Let me know how it turns out because I'm kind of stuck on this quick recipe as it is.

I have read some cooks who call this a "breakfast" cake.  As much as I love desserts for breakfast, this would be a bit too rich for me that early in the day.  It really is a dessert and the rich buttery goodness goes a long way. In my attempt to glamorize the end product, I swirled a bit of caramel over the top and added a strawberry.  It makes for a nice presentation, and even a nice flavor, but this cake can stand alone as it is.   I personally like it better chilled, versus warm out of the oven - but by all means try it both ways :)  It also freezes really well and I love to eat my desserts partially frozen.  I think deep down I believe that if a dessert is eaten frozen it only contains half the calories.  Please don't correct me if I'm wrong.


GOOEY BUTTER CAKE     
(recipe from Tasty Kitchen)
printable version

For the crust:
1 pkg. yellow cake mix
1 stick unsalted butter, melted (I have used salted butter with no problem)
1 egg

For the filling:
8 oz. cream cheese, room temperature
2 eggs
1 tsp. vanilla
1 stick unsalted butter, melted
3 3/4 cup powdered sugar

Preheat oven to 350°.
In a large mixing bowl, combine the crust ingredients with a wooden spoon until moist. Transfer to a 13x9" ungreased baking pan and spread evenly over the bottom of the pan. Set aside.
In another large mixing bowl, beat cream cheese with an electric mixer until fluffy. Add the eggs, vanilla, and melted butter, and continue to mix. Next, add the powdered sugar one cup at a time until all sugar is mixed in. Pour filling over the crust, and spread evenly with a spatula.
Bake gooey butter cake for 40-45 minutes until it is browned, but the center still jiggles when the pan is shaken. Cool for 30 minutes. Sprinkle with additional powdered sugar and serve.
<script type="text/javascript" src="//assets.pinterest.com/js/pinit.js"></script>

Friday, April 8, 2011

Serving Up {Breakfast}: Dr. D's Belgium Waffles

There are hundreds of waffle recipes out there and I'm convinced that 99% of them are a variation of one original recipe.    Flour, egg, oil, and milk - not a lot of variation.  Until this recipe.  Oh, it has all those ingredients you would expect to find, but it also has apple cider vinegar and almond extract.  Crazy and unexpected!  But oh so good!  You do have to be willing to dirty a few extra dishes to make the most out of this recipe, but I vouch that these waffles are worth it.  They bake up so crispy and airy - they practically melt in your mouth upon first bite.

If you are looking for something to shake up your waffle routine, this is a pretty good place to start.


DR. D'S BELGIUM WAFFLES     
(recipe from Melanie B.)
printable version

1 cup milk (I use whole)
1 Tbs. apple cider vinegar

Mix together the milk and vinegar and set aside.

1 stick butter, melted (I have used 1/2 stick and not noticed any decrease in yumminess)
2 egg yolks
1 Tbs. brown sugar
1/4 tsp. almond extract

Blend the butter, egg yolks, brown sugar and extract together.  Add the milk.

1 cup + 1 Tbs. flour
4 tsp. baking powder

Sift the flour and baking powder together.  Add the wet ingredients to the flour mixture and stir until well moistened.

2 egg whites, whipped well

Fold whipped egg whites into batter.

Cook as you would normally would, following your waffle iron instructions.

Wednesday, April 6, 2011

Serving Up {Salad}: Strawberry Spinach Salad

If I had to choose just one of my favorite salads to eat for the rest of my life, this would make the cut into at least the final three.  It is really that good!  When strawberries are in season I have been known to eat this for lunch everyday for a week or more, and have never tired of it.  In fact, after a week of eating it I will still salivate as the clock nears noon and I begin to think of eating it again.

This salad is just one of many terrific recipes that can be found over at the Sister's Cafe - one of my favorite food blogs!  It pairs spinach, strawberries, feta and pine nuts with a delightful lemon & Dijon dressing.  Not only is it delicious, it is beautiful and would be a gorgeous accompaniment to any Easter brunch.
 
STRAWBERRY SPINACH SALAD     Pin It
(recipe from The Sister's Cafe)
printable version

Dressing:
3 Tbs. fresh lemon juice
3 Tbs. sugar
1/2 Tbs. Dijon mustard
1/2 Tbs. grated lemon rind
1/4 cup canola or light olive oil

Combine all the ingredients in a blender.  Continue to pulse until the mixture is combined, thickened and the sugar is dissolved.

Salad:
3 cups fresh spinach
1 cup fresh strawberries, sliced
1/2 cup toasted pine nuts
Feta Cheese, to taste

In a large bowl, toss together the spinach, strawberries, nuts and feta.  Toss with enough dressing to coat.

Monday, April 4, 2011

Serving Up {Sandwich}: Slow Cooker Italian Beef Sandwich

I admit that my children are picky eaters.  I routinely have at least one child declare that dinner is "disgusting".  Every day.  No matter what is served.

This recipe is not only delicious but it is one of the few meals that EVERYONE in our little family eats with a smile - and frequently requests are made for seconds.  Because of that, and because it's ridiculously easy (thank you crock pot), I have delivered it on more than one occasion to a neighbor in need of dinner.  I figure if it passes our household taste test then it's safe to serve to just about anyone.

 
SLOW COOKER ITALIAN BEEF SANDWICH     Pin It
(recipe from Melanie B.)
printable version

1 ½ cups beef broth
1 cup water
1 tsp. salt
1 tsp. black pepper
1 tsp. dried oregano
1 tsp. dried basil
1 tsp. onion salt
1 tsp. dried parsley
1 tsp. garlic powder
1 bay leaf
1 0.7-ounce package dry Italian-style salad dressing mix
1 5-pound chuck roast

Combine water, beef broth and all seasonings. Whisk to combine.

Place roast in slow cooker and pour salad dressing mixture over the meat. Cover and cook on low for 10-12 hours or on high for 4-5 hours. When done, remove the bay leaf and shred the meat with a fork*; if you shred the meat ahead of time and allow it to sit in the juices, it will absorb more juice/flavor.

Serve on crusty rolls.  Frequently my husband will add a smear Dijon on his roll which is a nice flavor.  Our favorite addition (my husband and myself anyway) is to top our beef with coleslaw for an added flavor burst and a bit of a crunch.

* My tip for shredding cooked meat (beef or pork or chicken) is to use your potato masher.  It makes the task much faster than the two fork method.

Friday, April 1, 2011

Serving Up {Cookies}: Iced Sugar Cookies

Once I determined that I wanted to begin a food blog I put my camera on the refrigerator and started taking photos of everything I made.  I've been stockpiling these photos for two months and my kids are beginning to believe that all meals begin with a photo and then a blessing :)

Just about that time, it was Valentine's and my kiddos and I were making my favorite Sugar Cookie recipe.  I don't recall now whether these photos were taken with food blog in mind or as just a mommy and kids cooking photo.  Either way, my sweet two-year old's hand cutting the heart cookies is one of my favorite and became my inspiration for the header of my blog.  It seems only appropriate that I kick off my new blog with the recipe that we made that day.

When it comes to cookies, it seems that most people are either a crispy cookie lover or a soft & chewy cookie lover. My husband is the first. I am the later. I will never convince him to come over to my way of thinking, nor will I ever change my view.  This recipe falls under the soft & chewy (perfect) category. I have been making this recipe for over 25 years and while I have other Sugar Cookie recipes that I go to when I want a plain sugar cookie, this is my go-to recipe when doing roll-out cookies to frost and decorate.


SOUR CREAM SUGAR COOKIES     
(recipe from aunt Holly)

1 cup butter
2 cups sugar
2 eggs
3 tsp. vanilla
1 cup sour cream
7 cups flour
2 tsp. baking soda
1 tsp. salt

Cream the butter and sugar together for 3-5 minutes.  Add the eggs, vanilla and sour cream until well mixed in.  Gradually add the dry ingredients until all are incorporated.  Refrigerate until chilled.

When ready to bake, pre-heat the oven to 400 degrees.  Roll out the cookie dough on a floured surface to slightly more than 1/4" thickness.  Cut with cookie cutters and place on sprayed or parchment lined cookie sheet.  Bake for 8-10 minutes.  The edges will just be beginning to turn golden.  Don't overcook!  Cool on a wire rack. 

Frost and decorate once cooled completely.

Serving Up {LOVE}: Welcome to my kitchen

I love to cook.  I really do.  There is something about it that is therapeutic. Isn't it just crazy that with all there is to do in my busy life (I have four little people that call me mom) I actually find relief in my kitchen?

I guess I was a "foodie" before food blogs ever existed - I used to spend hours looking through my mom's Taste of Home magazines each month when a new issue came in the mail. If I got my hands on a new cookbook I would read the title of each and every recipe, especially when photos were included.  I have never understood why cookbooks wouldn't have a photo to accompany each and every recipe.

Recently our family relocated from sunny Las Vegas to (less sunny) Portland, Oregon.  Before I left I had a dear friend ask me for my recipes.  She paid me a huge compliment in doing so.  It took me a while but I finally put together a small recipe collection for her.  In doing so I realized that I have so many recipes in so many locations and I needed to have a place where our family favorites were consolidated - and that could include photos!

So, the food blog was born. My promise to you is that I will not post a recipe for something that is just "ho-hum" just for the sake of having a post. If it's posted, it's something we have made many times and love it as much the fifth time as the first. These recipes are the keepers!

And with that introduction, let the recipes begin. Thanks for checking it out.